
Packaging a pipeline for GATE Cloud - an example
This document presents a walk-through of the process of preparing a pipeline for publishing on GATE Cloud, using the GATE "TwitIE" Twitter processing pipeline as an example.
1. The application
TwitIE is a full GATE pipeline, containing the following customised components:
- Social media data Language identification;
- Twitter tokeniser, for handling smilies, user names, URLS and so on;
- A Tweet-specific part-of-speech tagger;
- Text normalisation PR.
TwitIE recognises common named entities, both general ones such as person and location names, and also Twitter-specific things such as hashtags. The TwitIE application is provided as part of GATE Developer, in the "Twitter" plugin.
2. Making the application self-contained
The first step in preparing an application for use on GATE Cloud is to gather all the required resources together into a single bundle and make sure the application is self-contained. The easiest way to achieve this is to use the "Export for GATE Cloud" function in GATE Developer.
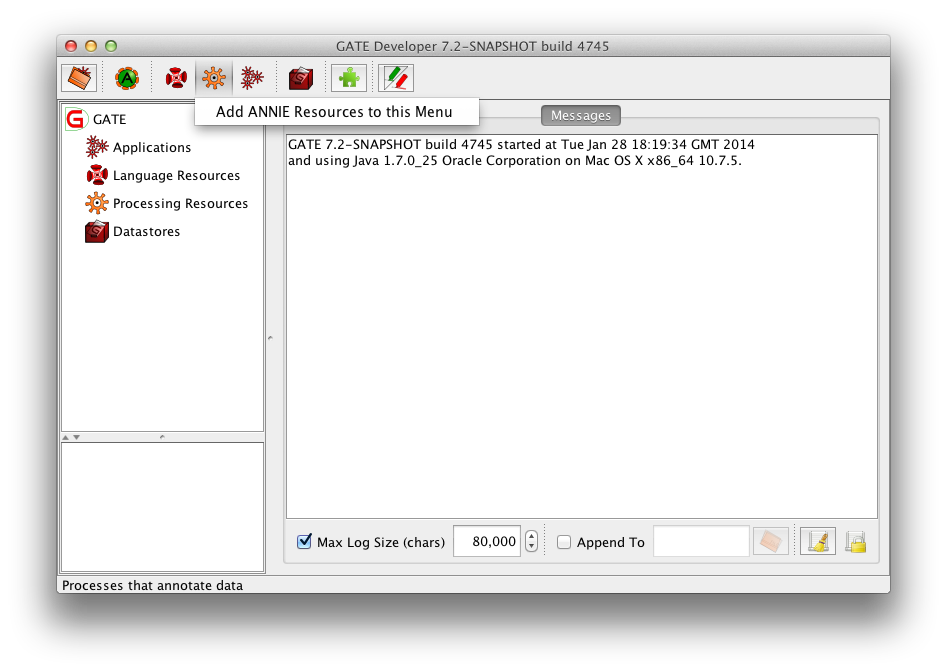
First ensure that you have closed all open pipelines and PRs in your GATE Developer, and unloaded all plugins to ensure you are starting from a clean state. The simplest way to do this is to exit GATE Developer, then delete your configuration and session files (gate.xml and gate.session in your user profile directory on Windows, .gate.xml and .gate.session in your home directory on other platforms) and start GATE Developer again. A quick way to verify that your GATE Developer is "clean" is to click on the "New Processing Resource" button - if there are no plugins loaded then you will see the option to "Add ANNIE Resources to this Menu".
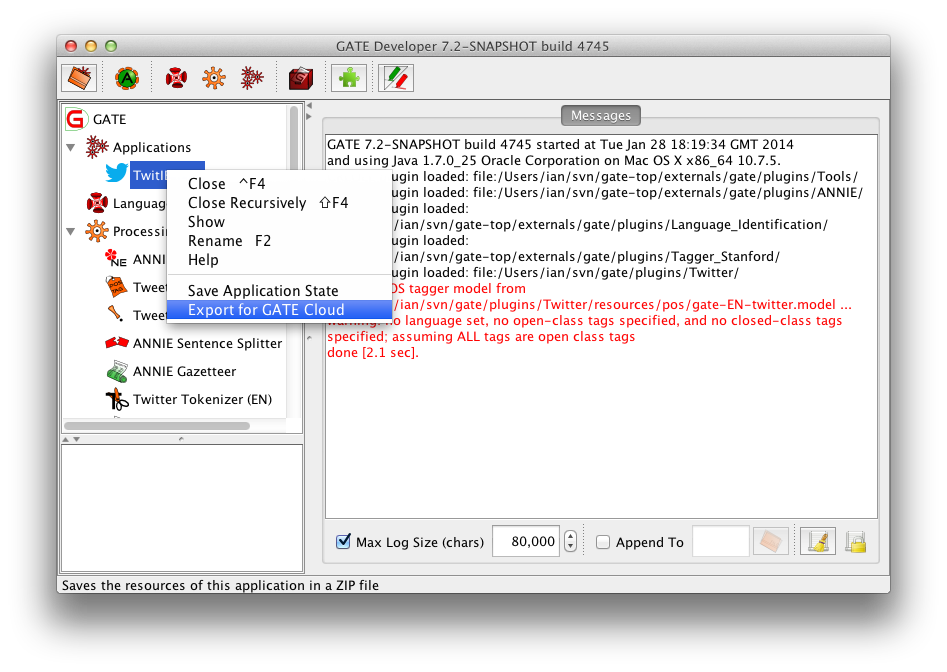
The TwitIE application is provided as an xgapp file in the Twitter plugin, so you can load it using "File" -> "Restore Application from File...", navigate to your GATE Developer installation, then plugins/Twitter/resources/twitie-en.xgapp. Once you have loaded TwitIE, right click on the application in the left hand tree and select "Export for GATE Cloud".
Select an appropriate destination file name and proceed with the export. It will take a few seconds for GATE to export the application, as it must bundle all the loaded plugins into the zip file (including trained models for the part-of-speech tagger).
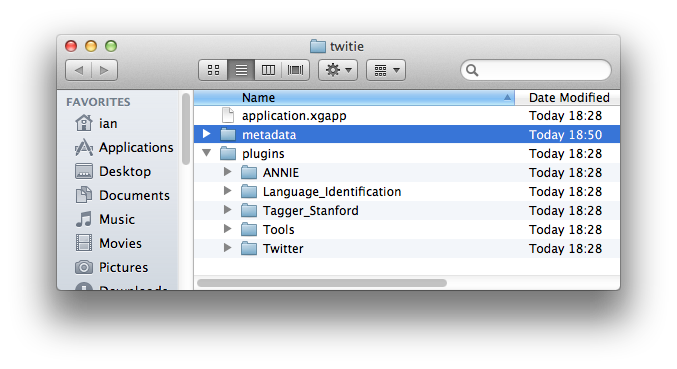
Unpack the resulting zip file into a temporary location, and verify that you have application.xgapp and a maven-cache.gate directory containing a several different plugins. For TwitIE there should be no other directories alongside application.xgapp, as all the resources the pipeline uses are contained within its plugins. If your application uses older "directory-style" plugins (or is based on GATE 8.4.1 where all plugins are of this style) there will also be a plugins directory containing those.
As an additional sanity-check it is recommended at this point that you close GATE Developer, delete your gate.xml and gate.session files again, and then attempt to re-load the pipeline from the application.xgapp file you just unpacked. If the re-loading failed then there may have been a problem with the automatic export process, and you may need to make some further tweaks by hand. However this is beyond the scope of this walk-through — ask on the gate-users mailing list if you have trouble when packaging your own pipeline.
3. Creating the metadata
There is already a full set of metadata for TwitIE available in the Twitter plugin directory, but for the purposes of this tutorial we will prepare our own from scratch. You can find the standard metadata in src/main/resources/resources/.twitie-en-metadata of https://github.com/GateNLP/gateplugin-Twitter if you want to refer to it later.
The next step is to create metadata describing the application. As explained on the "how to publish" page, every pipeline on GATE Cloud requires metadata to define
- how it should appear on the shop (its icon, descriptive text, etc.)
- how it should be classified (i.e. tags)
- what annotations it produces as output (for the APIs)
The metadata must appear at specific locations in the pipeline ZIP, so you should now create a folder named metadata in the location where you unpacked the exported ZIP file.
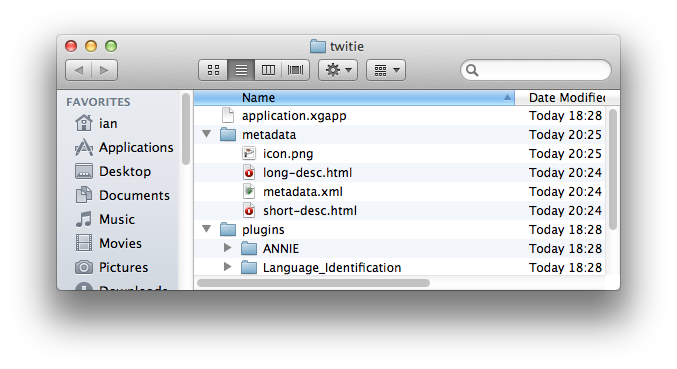
For the shop view you will need to create two files in the metadata directory, named short-desc.html and long-desc.html. These two files should contain fragments of HTML rather than complete HTML documents (they will form the content of <div> elements) so they must not have html or body tags, and they should not reference any JavaScript. The short-desc.html will appear within the pipeline's tile within the list of pipelines in the shop, so should be a short one or two sentence description (max 255 characters) of the pipeline, for example:
Named entity recognition service for Twitter data.  Identifies <em>person</em>,
<em>location</em>, <em>organization</em> etc. and also performs
normalization of abbreviations and common shorthands ("brb", "gr8", "2day",
etc.).
The short description may make use of inline HTML elements such as em or strong but must not include any images or block-level markup (such as headings).
The long-desc.html is for full details of the pipeline, and will be displayed as part of the pipeline's detail page. This file may include block-level markup such as paragraphs, headings and lists, as well as references to image files located in the metadata directory using relative paths — for example you could place a file details.png in the metadata directory alongside long-desc.html, and refer to it using <img src="details.png">.
For the purposes of this tutorial you can simply make long-desc.html a copy of short-desc.html.
You will need to provide an icon for the pipeline, which should ideally be 64x64 pixels with a transparent background. For this tutorial, you could use an icon such as this one. The icon must be named icon.png, within the metadata directory. The icon will be displayed both in the pipeline's tile on the list page and at the top left of the detail page — you do not need to refer to it explicitly within your long-desc.
metadata.xml
The final required file in the metadata directory is metadata.xml, which stores the remaining metadata that does not need to be broken out into individual files. Create the following template metadata.xml file:
<metadata xmlns="http://gate.ac.uk/ns/pipeline-metadata">
  <pipeline-name></pipeline-name>
  <slug></slug>
  <ordering></ordering>
  <annotation-selectors></annotation-selectors>
  <additional-annotations></additional-annotations>
  <tags>
  </tags>
</metadata>
Now we can fill in the blanks. The pipeline-name is the name of the pipeline as it will appear in the list in the shop, for example:
<pipeline-name>TwitIE Named Entity Recognizer for Tweets</pipeline-name>
The slug is essentially the unique identifier for this pipeline in the GATE Cloud system - if you later want to deploy an updated version of your pipeline you can change the pipeline name but must keep the same slug. It should be suitable for use as a component of a URL, so should typically include only lower-case letters, digits and hyphens, with no spaces or other punctuation.
<slug>twitie-ner-for-tweets</slug>
The ordering is a number governing the order in which the pipelines are displayed in the GATE Cloud services list - lower numbers appear before higher numbers. We can suggest a suitable ordering value for each pipeline, for the moment just use a reasonable default of 100.
<ordering>100</ordering>
tags is a list of tags used to classify the pipeline — the shop interface allows users to restrict their view to just pipelines with a certain tag or combination of tags. Tags are free text, but where appropriate you should try and re-use tags that are already in use for other pipelines rather than creating new ones. There are several types of tags in common use for GATE Cloud pipelines:
- functional tags — what does the pipeline do (e.g. "Named Entity", "Parser", "Part-of-Speech")
- language tags — what natural language(s) does the pipeline process (e.g. "English", "Russian")
- domain/genre tags — what kind of data is the pipeline best suited to (e.g. "News", "Twitter")
Choose some appropriate tags for TwitIE, for example
  <tags>
    <tag>English</tag>
    <tag>Named Entity</tag>
    <tag>Twitter</tag>
  </tags>
The annotation-selectors and additional-annotations declare which are the "significant" annotations produced by the pipeline. GATE pipelines typically produce different annotations of varyiing granularity, from Token and Sentence through named entities such as Person to structural annotations such as NounChunk. Depending on the pipeline some of these might be more important than others — for a part-of-speech tagger pipeline we would want to return all the Token annotations by default, but for a semantic tagger the tokens might be an internal detail.
The annotation-selectors value determines the annotations that are returned by default when this pipeline is run via the GATE Cloud APIs, and the additional-annotations value declares other annotations that should be offered as options in the "test this pipeline" interface on cloud.gate.ac.uk, but which should not be returned by default.
Each annotation selector expression is made up of two parts separated by a colon — annotationSetName:annotationType. Either or both parts of the expression may be empty, an empty annotation set name denotes the default annotation set and an empty annotationType means that all annotations in that set are considered significant. The annotation-selectors element in the metadata file should contain one or more annotation selector expressions separated by commas.
TwitIE is unusual in that it includes both a POS tagger and a named entity recognition component as "significant" functionality, therefore its annotation selectors will include Token as well as various named entity types (e.g. Person, Location, Date) and Twitter-specific annotations such as HashTag and UserID. All TwitIE's annotations are in the default annotation set, so:
<annotation-selectors>:Token, :Emoticon, :Hashtag, :URL, :UserID, :Address, :Date, :Location, :Organization, :Person</annotation-selectors>
In addition to the common annotation types of Person, Location and Organization, TwitIE also produces less commonly used types such as Money and Percent, and it also generates Sentence annotations as a side-effect (since they are required by the POS tagger), so we might as well make those available as "additional" annotations:
<additional-annotations>:Money, :Percent, :SpaceToken, :Sentence</additional-annotations>
(do not word-wrap the annotation-selectors value in your metadata.xml).
With all these files in place you can re-pack the zip file, being careful to ensure that you do not add any additional directory entries — application.xgapp and the metadata folder must be at the top level of the zip file.